


Document Actions
gvSIG-Desktop 1.1. Manual de usuario.
Edición alfanumérica (Tablas)
Introducción
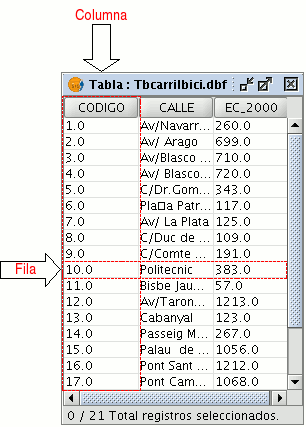
A table is part of a data base. It is made up of rows or records and columns or fields which contain the alphanumeric information needed to characterise the elements (polygons, lines or points) which make up the theme maps, cartography in general and graphs. The rows represent elements or objects and the columns represent the variables or attributes associated with each element.
In general terms, there are two types of tables; “internal” tables which are typical of an information layer and are found in the same file and “external” tables which can be added to a gvSIG project. Each element (point, line or polygon) of a layer only has one record in that layer’s table of attributes.
Pasos a seguir en una sesión de edición de una tabla 'interna'.
Open a “View” and add the layer you wish to work with.
Remember that to start an alphanumeric editing process in gvSIG, you must put the layer you are working with in editing mode. In order to do this, select the layer in the ToC, go to the “Layer” menu and select “Start edition”. Select the “See table of attributes” button

or go to the “Layer” menu and select “See table of attributes”.
The table associated with the layer will be automatically added to the project.
If you go to the “Project Manager” and select the “Tables” type of document, you can check that the table shown in the view is included as a separate document in the project.
To finish the table editing session, go to the “Layer” menu and select “Finish edition”. When the session finishes a message appears asking if you would like to save the changes. Click on “Yes” to save all the changes made in the table.
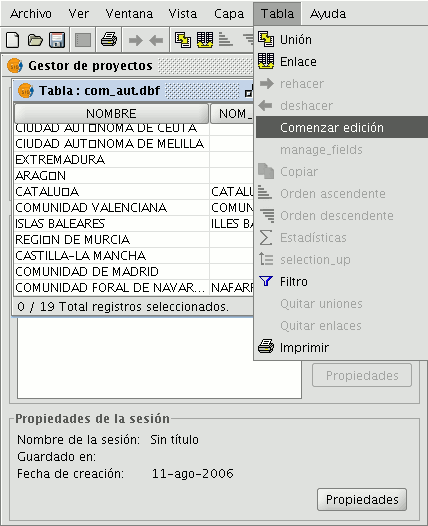
Pasos a seguir en una sesión de edición de una tabla 'externa'.
- Go to the gvSIG’s “Project Manager”, and select the “Tables” type of document.
- Click on “New”.
- Click on “Add” and open the table you wish to edit.
- When you click on “Open” the table is displayed automatically on the screen.
- Go to the “Table” menu and select “Start edition”.
Edición de la tabla de atributos de una capa
Añadir un registro
To add a new record to a table associated with a layer, a graphic element must be inserted. When an element is added to the associated table a new blank record appears.
Enter the data for the new entity and press “Enter”.
N.B.: Remember that if you wish to delete the selection, you can go to the tool bar and click on “Clear selection” or you can use the menu bar by clicking on the “Layer” menu and then on “Clear selection”.

N.B.: You can create a new layer with the elements selected in the table if you wish. To do so, close the table, go to the menu bar and click on the “Layer” option and then on “Export to ...”. Then select the format you wish to create the new layer with.
Modificar un registro
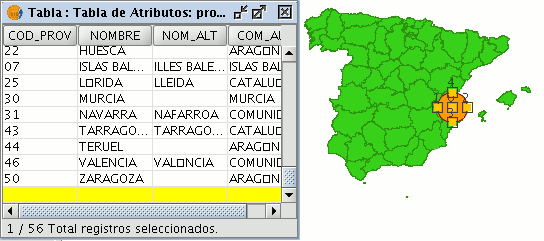
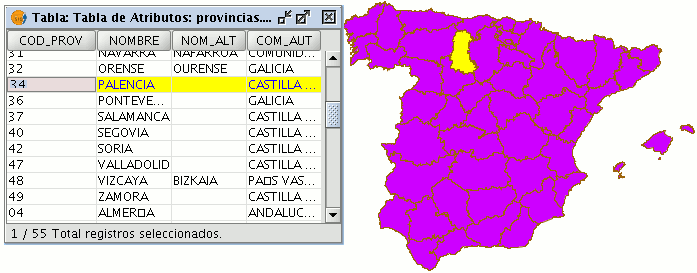
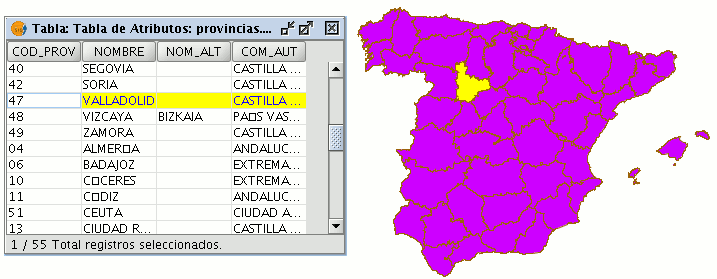
To modify the data of a layer element saved in the table, select the element whose data you wish to modify. The record that corresponds to the selected graphic element is highlighted in yellow in the table of attributes.
Left click on the cell in which the record to be modified is located. The record changes and a cursor appears to indicate that the data can be input.

Eliminar un registro
To remove a record from the table, you must first select the record.
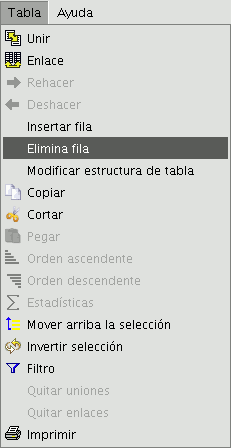
Go to the “Table” menu and select “Remove row”.
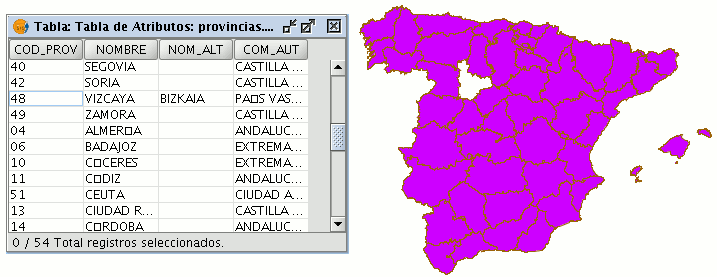
The selected record is deleted from the table and the associated graphic element disappears from the view.
Modificar la estructura de una tabla
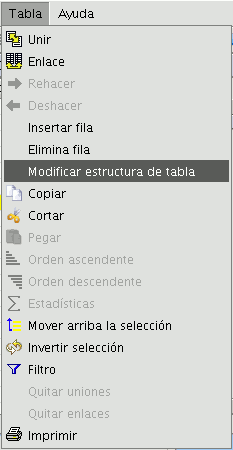
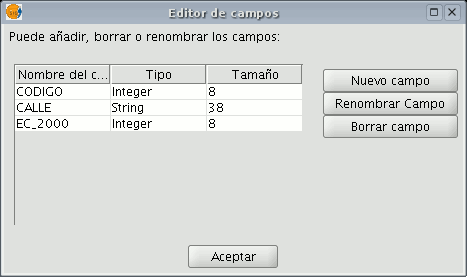
This tool allows you to add, delete or rename fields. To access this tool, go to the “Table” menu and select “Manage fields”.
(An error occurs when you try to change the structure of a table hosted in a postgresql data base above version 7.4. To modify the structure, use a suitable data base manager).
When the menu option is selected, a window appears in which the fields of the selected table and the buttons to create a new field or delete or rename an existing field are included.
If you click on “New field”, a new window appears in which some of the properties of the new field to be added to the table can be configured.
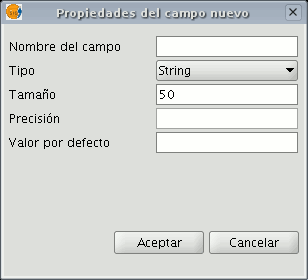
Field name: Enter the name of the new field. Type: If you click on the arrow on the right, a pull-down menu appears in which the type of field data (string, double...) can be configured.
Length: Indicate the required length of the field. Debe tener en cuenta que el tamaño máximo para un campo de tipo string es 254.
Precision: Indicates the number of decimals a numerical field must have (only for numerical type fields).
Default value: Indicates the default value for the field when no specific value is defined in the table.
If you wish to use the delete tool (“Delete field”) and the renaming tool (“Rename field”), simply select the field to be modified and click on the corresponding button.


